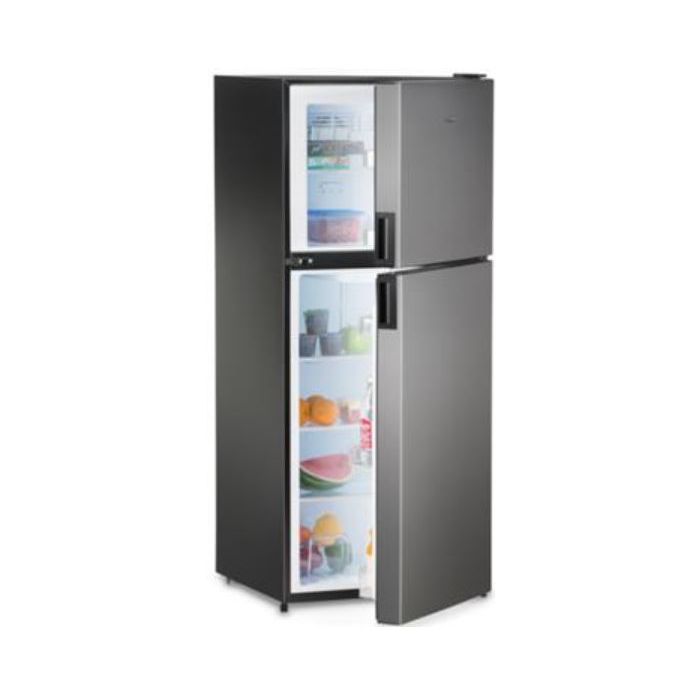
## Compressor Fridge
by Dometic
About This Part
Product Name: Dometic 8 Cu. Ft. DC Compressor Stainless Steel Right Hand Refrigerator 8 cu. ft. interior capacity 12V DC compressor Stainless steel doors, reversible hinges Tempered glass shelves, dual crisper drawers, LED interior light Digital control panel with eco/silent/performance modes Exterior dimensions: 53.6" H x 23.6" W x 27.5" D Fits 6 cu. ft. cutout but offers 8 cu. ft. space[1][2] Description: Designed for RVs and campervans, this Dometic 12V compressor fridge delivers quiet, efficient cooling and a homestyle layout for easy food organization. Its stainless steel finish and reversible door add to its flexibility in van conversions. ## Dometic Absorption (3Way) Fridge Product Name: Dometic RMS 10.5T 83L (2.9 cu. ft.) capacity Absorption technology (3way: 12V DC, 220V AC, LP gas) TFT display, doublehinged door Designed for quiet, flexible RV/camper use Description: A quiet, versatile absorption fridge by Dometic, ideal for offgrid and hybrid power systems in campervans. Suitable for those wanting LP gas operation alongside 12V/AC options. ## Norcold 3Way Fridge Product Name: Norcold NRF 30[^norcold_manual] etrailer.com: Check current listings RVupgrades: Sometimes stocks Norcold 3way refrigerators 2.7 cu. ft. capacity Absorption (3way: 12V DC, 120V AC, LP gas) Manual or automatic energy selection Fits typical RV cutouts Description: A classic RV 3way fridge, offering three power sources for maximum versatility. Norcold’s NRF 30 is a proven choice for offgrid and hybrid power setups. ## 12V Cooler Product Name: Dometic CRX Pro 65 Compressor Cooler 61L (2.1 cu. ft.) capacity Compressor technology, 12V DC Flexible as fridge or freezer Compact, portable design with durable housing Description: This Dometic 12V cooler is ideal for van life, with robust performance as a fridge or freezer. Its portable design makes it a versatile option for any campervan setup. ## Large 12V DC Compressor Fridge for Van Product Name: Dometic DMC4101 RV Compressor Refrigerator 10 cu. ft. interior capacity 12V DC compressor Stainless steel doors, recessed handles Tempered glass shelves, dual crisper drawers, LED lighting Smart variable speed compressor, digital controls Fits 8 cu. ft. cutout Description: The Dometic DMC4101 delivers residentialstyle cooling in a campervan, with quiet, energyefficient operation and ample storage. Its modern design and digital controls make it a top choice for serious van conversions. > Clickable URLs have been included as instructed—confirm device/location for functional links.
Where to Buy
Installation Information
Van Compatibility: Designed to fit RV/vans with 8 cu. ft. cutouts; confirm Sprinter/Transit/ProMaster measurements.
Buying Guide
Choosing the right compressor fridge for your campervan or RV conversion can significantly enhance your traveling experience. Here's a detailed guide to help you make an informed decision when considering Dometic's compressor fridges.
What Makes Dometic Compressor Fridges Ideal for Campervan Conversions
Dometic compressor fridges are ideal for campervan conversions due to their energy efficiency, portability, and versatility. They can operate on both 12V and 24V systems, making them suitable for use with leisure batteries common in campervans. Features like reversible door hinges and beveled edges allow for flexible installation, maximizing space on board.
Key Features and Benefits
- Energy-Efficient Compressors: These fridges offer variable speed compressors that reduce power consumption, making them suitable for off-grid adventures.
- Dual Function Locks: Acting as vents, they help maintain optimal fridge temperature and humidity.
- 3-in-1 Capability: Some models, like the CRX Pro series, can be used as a fridge, freezer, or both, offering flexibility in food storage.
- Compact Design: Ideal for small campervans, these fridges are designed to fit snugly, minimizing space usage.
What to Look for When Buying
- Capacity: Consider the size of your campervan and the number of people using the fridge. Models like the NRX 50E offer 44L capacity, while the CRX65T provides 60L.
- Power Consumption: Ensure the fridge is compatible with your campervan's power system and battery capacity.
- Installation Flexibility: Look for models with reversible hinges and beveled edges for easy integration into your campervan's layout.
Common Mistakes to Avoid
- Incorrect Installation: Ensure proper installation to avoid energy inefficiency and performance issues.
- Insufficient Power Supply: Failing to match the fridge's power requirements with your campervan's electrical system can lead to reduced performance or damage.
Best Use Cases
- Weekend Warriors: For occasional use, smaller models like the CRX50T are ideal.
- Full-Time Living: Larger models or those with more flexibility, like the CRX Pro 65, are better suited for extended use.
Budget Considerations and Value Analysis
When purchasing a Dometic compressor fridge, consider the cost against the benefits of energy efficiency, durability, and the ability to run on solar power. Although these fridges may be more expensive upfront, their long-term savings and performance make them a valuable investment for both short-term and long-term campervan living.
Product Comparison
A compressor fridge for campervans and RVs is known for its efficient cooling, fast temperature drop, and reliable performance regardless of outside conditions[1][2][3]. Here’s how it compares to similar products:
Alternative Products with Similar Function
- Dometic CRX50 Compressor Fridge by Dometic
- Dometic RM8400 Absorption Fridge by Dometic
- BougeRV 53 Quart Compressor Fridge by BougeRV
- Thermoelectric Coolboxes (e.g., Mobicool by Dometic)
Pros & Cons
| Product | Pros | Cons |
|---------------------------------------------------|------------------------------------------------------------------|---------------------------------------------------------------|
| Compressor Fridge (general, e.g., Dometic CRX50) | - Cools quickly (to 4°C in 30 min)
- Stable temps
- Works when RV is unlevel
- Efficient with 12V DC/battery | - Higher upfront cost
- Slight compressor noise[1][2][3] |
| Absorption Fridge (Dometic RM8400) | - Silent, no moving parts
- Runs on gas/12V/AC
- Long off-grid with LPG | - Slow cooling (4–6 hr)
- Poor temp control in hot weather
- Needs to be level[1][2][4] |
| BougeRV 53 Quart Compressor Fridge | - Reliable temp control
- Quick cool time (2 hr to 5°C)
- Efficient | - Slight compressor noise
- Pricey for larger models[2] |
| Thermoelectric Coolbox | - Lowest price
- Silent
- Simple, no compressor | - Only cools to 20°C below ambient
- Not for hot climates
- No freezer[2][3][7] |
Price Range Comparison
- Compressor fridges: Typically $500–$1,200 USD (Dometic/BougeRV mid-size models)
- Absorption fridges: $600–$1,400 USD, depending on capacity and features
- Thermoelectric coolboxes: $70–$300 USD
When to Choose Each Option
- Compressor fridges:
- Best for full-time van life, extreme climates, off-grid solar setups, or where level parking isn’t guaranteed[1][2].
- Essential if you need fast chilling (for perishables/dairy) and consistently cold temperatures.
- Absorption fridges:
- Useful for long boondocking/off-grid with access to LPG and must-have silent operation.
- Suitable where AC power is available or for propane reliance[4].
- Thermoelectric coolboxes:
- Suitable for weekenders or mild climates, mostly for drinks or snacks—not for critical food storage[2][3].
Performance Differences for Van Life
- Compressor fridges outperform alternatives in cooling speed, energy efficiency on 12V, temp stability, and real-world usability (they work while driving, off-angle, in both heat and cold)[1][2][3].
- Absorption models excel in silence and off-grid longevity (with gas), but require leveling and are far less effective in hot weather[1][2][4].
- Thermoelectric coolboxes are lowest in price but can’t reliably chill food below safe levels in warm conditions and are mainly supplemental[2][3].
Choose a compressor fridge for reliability, energy-saving, and challenging travel conditions, especially if you’re committed to van life or travel in fluctuating climates[1][2][3].
Installation Tips
Tools Required
- Screwdrivers (Phillips and flathead)
- Drill with bits (for securing the fridge and/or vents)
- Wire strippers and crimpers
- Multimeter (to check voltage and continuity)
- Crimp connectors or terminal blocks
- Measuring tape
- Suitable cable (3–6 mm² cross-section, depending on run length)[1][2]
- Sandpaper (for grounding connection)[1]
Prerequisites
- Ensure a secondary/leisure battery and fuse panel are installed and operational.
- Identify an appropriate mounting location that allows for adequate ventilation (at least 30–40 mm clearance at the back, and air gaps above and below)[1][2].
- Plan wiring routes from the power supply to the fridge.
- Confirm cabinet or mounting area fits your chosen compressor fridge model[2].
Step-by-Step Instructions
-
Choose and Prepare Location
- Select a spot with sufficient ventilation; allow 30–40 mm clearance behind and vents above and below to dissipate heat from the compressor[1][2].
- Place the fridge in its cabinet or mounting space to test fit. -
Install Ventilation (if needed)
- Add vent holes or panels above and below the mounting location for airflow; fit spacers to raise the fridge off the floor, if necessary[2]. -
Wiring Preparation
- Measure distance to battery/fuse panel; select cable with a cross-section between 3–6 mm² (longer runs need thicker cable to reduce voltage drop)[1][2].
- Prepare cables with extra length to ease final connections. -
Electrical Connections
- Connect the positive (red) wire to an isolation switch or dedicated fuse in the panel (usually 3–10 A, check fridge specs)[2].
- Connect the negative (black) wire to either the battery’s negative terminal or a clean grounding point on the chassis (sand away paint for a good earth connection)[1]. -
Mount and Secure Fridge
- Carefully slide the fridge into place after all wires are attached.
- Fix the fridge using screws or supplied brackets to prevent movement while driving[3][4]. -
Testing
- Switch on the power and verify operation via fridge control panel or Bluetooth app (if available)[3].
- Check cooling after 30–60 minutes.
Common Mistakes
- Skipping or reducing ventilation, causing the fridge to work inefficiently or overheat[1][2].
- Using cables that are too thin or too long without increasing gauge, leading to voltage drop and premature cutout[1].
- Failing to securely earth the negative wire (paint or rust at grounding point blocks good connection)[1].
- Forgetting to add an isolation switch or fuse for safety[2].
Pro Tips
- Use pre-wired switch panels with in-built fuses for cleaner installs and added protection[2].
- Leave extra slack in wiring and use removable connectors for future servicing[1].
- Label all cables at both ends for easier troubleshooting later.
- If cabinet space is tight, install small computer or caravan ventilation fans to boost airflow and improve efficiency.
Time Estimate
- Typical installation time: 2–4 hours for basic setups; up to a day for complex cabinetry or ventilation work[2][3][4].