## Entry Step
by - **Direct product URLs** go to the manufacturer or an authorized dealer for accurate documentation.
About This Part
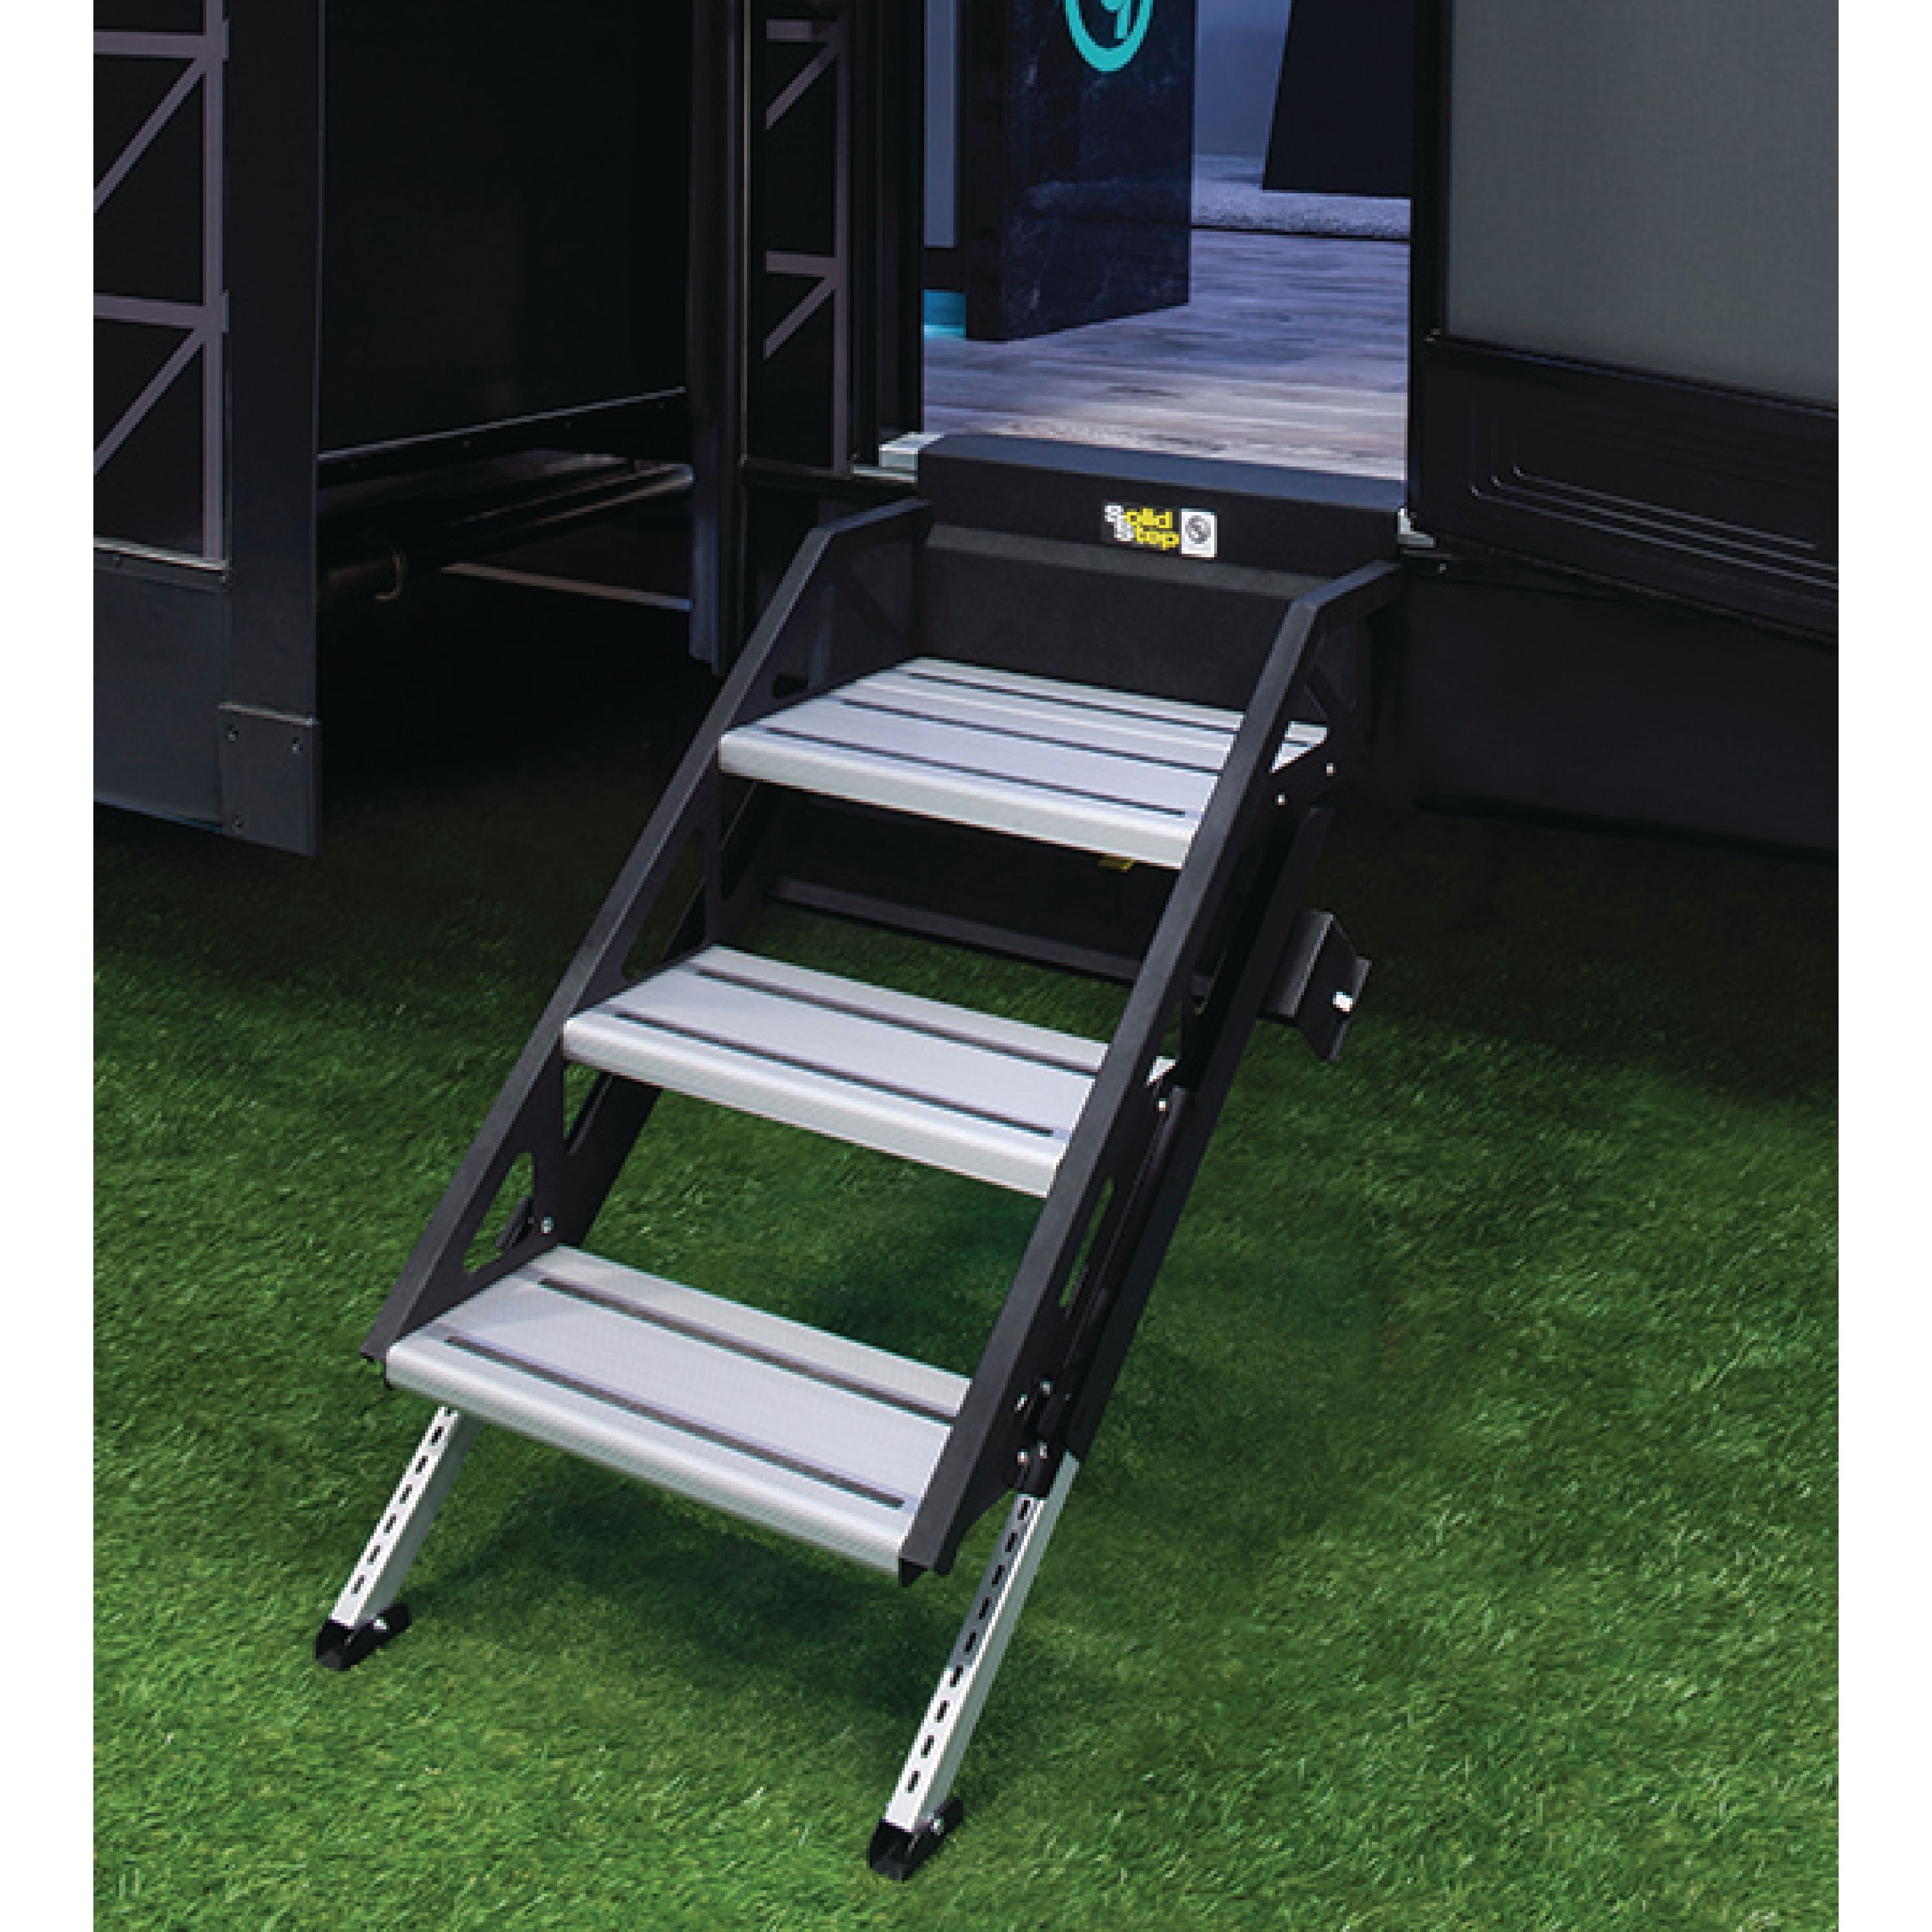
Product Name: Lippert SolidStep FoldDown RV Triple Steps 3036" width (fits most vans) Heavygauge steel construction Step storage manual design (deploy by hand) Aluminum treads for durability Description: These manual, solidsteel folding steps offer a stable, wide entry for RVs and campervans, with easy deployment and durable aluminum treads for allweather use. They reduce rattling compared to conventional steps and are designed for repeated deployment/storage. ## Handrail Product Name: Torklift GlowStep Revolution Handrail 24" long, powdercoated aluminum Compatible with GlowStep Revolution step system Description: This rugged, powdercoated aluminum handrail provides a secure grip for anyone entering or exiting the campervan. It’s designed to work seamlessly with the GlowStep Revolution steps but can be installed on any compatible entry location. ## Door Handle Product Name: Winnebago Sprinter Exterior Door Handle OEM replacement for Mercedes Sprinterbased RVs (e.g., Winnebago View, Itasca Navion) Black plastic housing with chromeplated handle Description: This genuine MercedesBenz part is a direct replacement for the exterior door handle on Sprinterbased campervans. It restores function and appearance after wear or damage. ## Screen Door Product Name: RecPro Aluminum RV Screen Door with Security Bar 30" wide, 77" tall (standard RV door size) Aluminum frame Retractable security bar Powdercoated finish ## Mud Flaps Product Name: Husky Liners® Custom Fit Rear Mud Flaps Durable rubber construction Custom fit for Sprinter/Transit/ProMaster Includes fasteners and instructions 53611: Mercedes Sprinter 2014–2025 53612: Ford Transit 2015–2025 53613: Ram ProMaster 2014–2025 ## Key Notes Amazon and etrailer offer both convenience and customer reviews for aftermarket comparisons.
Where to Buy
Installation Information
Van Compatibility:
Buying Guide
The Entry Step is a crucial component for safe and convenient access to campervans and RVs, making it an ideal upgrade for any conversion aiming for both comfort and utility. Below is a detailed buying guide covering its selection for campervan and RV builds.
What Makes the Entry Step Ideal for Campervan Conversions
- Enhanced Safety: Lowers the risk of slips and falls by providing stable footing when entering and exiting the van.
- Accessibility: Improves access for people of all ages and mobility levels.
- Space Efficiency: Compact designs don’t compromise precious floor space inside the van.
- Customization: Available in manual or powered (automatic retract) models to fit varying build styles and needs.
Key Features and Benefits
- Non-Slip Surface: Ensures grip even in wet conditions, increasing safety.
- Weather-Resistant Materials: Aluminum or powder-coated steel resists rust and corrosion for longevity.
- Retractable or Fixed: Retractable steps minimize drag and keep the doorway clear; fixed versions offer reliable, always-on access.
- Weight Rating: Designed to support weight comfortably (check manufacturer specs).
What to Look for When Buying
- Correct Sizing: Match step width and depth to your campervan’s doorway for comfortable use.
- Mounting Compatibility: Ensure that the step’s mounting bracket fits your vehicle chassis.
- Operation Type: Decide between manual fold-out (simpler, less to repair) vs automatic (more convenient but may require electrical work).
- Load Capacity: Verify that the step supports at least 300 lbs for typical use.
- Warranty and Documentation: Buy from authorized dealers with clear documentation for installation and support.
Common Mistakes to Avoid
- Choosing Incorrect Size/Style: A step that’s too short or too narrow can be dangerous and inconvenient.
- Ignoring Compatibility: Not all entry steps fit every van/RV make and model; verify compatibility prior to purchase.
- Overlooking Electrical Requirements: If opting for a powered step, confirm your van’s electrical system can support extra draw.
- Neglecting Quality: Cheap models often corrode, break, or loosen quickly, costing more in the long run.
Best Use Cases
- Weekend Warriors: Manual steps are cost-effective, require low maintenance, and suit infrequent use.
- Full-Time Living: Automatic or heavy-duty steps offer daily convenience and durability and are worth the investment for frequent entry/exit.
Budget Considerations and Value Analysis
- Low-End Manual Step: $50–$150, good for tight budgets and DIY installations[3][4].
- Mid-Range Powered Step: $200–$450, balancing cost, features, and ease-of-use.
- High-End Luxury Step: $500+, provides premium durability and full automation, best for high-dollar professional conversions[1][2].
- DIY vs. Pro Install: Installing a manual step is straightforward and low-cost, while a powered step may require professional help, raising labor expenses.
When weighing budget, prioritize safety, compatibility, and longevity. Investing slightly more in an entry step from an authorized dealer gives you installation guidance and warranty coverage, ultimately saving money and hassle over time[1][7].
Make sure to consult manufacturer specs and select direct product URLs from the manufacturer or an authorized dealer for accurate documentation on sizing, installation, warranty, and service support.
Product Comparison
Three to four alternative products similar to the Entry Step (assuming a manual fold-up or solid entry step commonly found on modern campervans/RVs) include:
MOR/ryde StepAbove RV Steps
- Pros:
- Steps reach the ground for maximum stability.
- Grooved aluminum treads provide secure footing.
- Adjustable feet help on uneven terrain[1][7].
- Cons:
- Requires careful measurement for fit; not universally compatible.
- Must fold into the doorway, potentially bringing dirt inside on travel days[3].
- Price Range: \$200–\$350 depending on size and configuration[1].
- Performance for Van Life: Best for frequent use, boondocking, or uneven campsites due to stability.
Lippert Solid Step RV Steps
- Pros:
- Extra-wide top step enhances comfort and safety[1][6].
- Aluminum treads; recessed adjustable feet.
- Stows in the doorway for travel.
- Cons:
- Can interfere with some screen doors, requiring adjustment[1][3][6].
- Also folds inside, meaning dirt management could be needed.
- Price Range: \$220–\$340 depending on step count[6].
- Performance for Van Life: Suitable for vanlifers who prioritize wide, stable footing and frequent setup/teardown.
TorkLift GlowStep Revolution Uprising
- Pros:
- Modular design offers 2–6-step options for different heights[8].
- Folds and telescopes for uneven ground.
- Lightweight, all-aluminum; rust-resistant.
- Optional glow strips for nighttime visibility.
- Cons:
- More expensive; premium pricing due to modularity[3].
- Installation may require modifications to some frames[3].
- Price Range: \$350–\$600, varies with step count and features[8].
- Performance for Van Life: Ideal for heavy daily use, pets/kids, and off-grid scenarios; highly adjustable and safe.
Kwikee Electric Step by Lippert
- Pros:
- Automatic extension/retraction via electric motor simplifies entry/exit[1][5].
- Built-in safety lights for nighttime use.
- Cons:
- Requires electrical integration; may fail if motor/wiring problems occur[5].
- Typically heavier and pricier.
- Price Range: \$400–\$800+ depending on features and step count[5].
- Performance for Van Life: Best for those with limited mobility or preference for convenience, but requires existing battery system and maintenance.
When to Choose Each Part
- Choose the Entry Step (manual, solid, fold-up style) if you want a balance of stability, cost, and reliable function with minimal maintenance.
- Opt for TorkLift GlowStep if you need the ultimate adjustability and modular design, especially for varying terrain and heights.
- Pick Lippert Solid Step for extra width and comfort, especially if interior door compatibility is assured.
- Select Kwikee Electric Step if ease of access and automation is most important, or if you have special mobility needs.
Performance Differences for Van Life
- Manual/fold-up steps (MOR/ryde, Lippert) provide durability, easy repair, and better adaptability for boondocking and off-grid locations.
- Modular steps offer safe, adjustable entry for all user types and conditions.
- Electric steps tend to suit longer stays at serviced campgrounds but may need more maintenance and have higher cost.
Price and feature differences are significant: manual steps are \$200–\$350, modular/premium are \$350–\$600, and electric steps \$400–\$800+[1][8][5].
Installation Tips
Tools Required
- Cordless drill or screw gun
- Appropriate drill bits (commonly 5/32" for wood subfloor, 13/64" for laminate/metal)
- Socket set or ratchet
- Tape measure
- Phillips and flathead screwdrivers
- Level
- Safety glasses and gloves
Prerequisites
- Remove the old step assembly if present; typically done by detaching 4 bolts (two each side), then lifting it out[1][3].
- Measure and confirm that your new step model fits the door opening and that the doorframe is compatible with the step mechanism[2][6].
- Park your campervan on stable, level ground and chock wheels for safety[6].
- If installing in place of existing steps, ensure that mounting holes or surfaces are sound and clean.
Step-by-Step Instructions
1. Unbox and inspect your new entry step assembly, ensuring all parts and hardware are present[1].
2. Position the step assembly in the entry doorway, with the step extended in the down position. Make sure the top of the step sits firmly and level with the threshold—no gap[1][3].
3. Center the step in the doorframe using a tape measure[1].
4. Mark and drill pilot holes for mounting:
- For wood subfloors: Use a 5/32" bit[1][3].
- For laminate/steel subfloors: Use a 13/64" bit and prepare to use bolts and a backing plate if specified by manufacturer[1].
5. Insert and loosely secure the mounting screws/bolts into the pilot holes, but do not fully tighten yet[1].
6. Lift the step into the upright/stored position. Adjust the latching mechanism side-to-side so it engages properly; tighten adjustment bolts once alignment is correct, but do not overtighten[1].
7. Test the operation by deploying and storing the steps, confirming smooth movement and proper latching.
- Test for road vibration by shaking the assembly[1].
8. Once satisfied, fully tighten all mounting fasteners and install any additional security hardware per instructions.
9. Confirm ground contact: The step legs should contact the ground solidly when deployed, adjusting as needed for stability[2][6][3].
10. Clean up area and verify the assembly is secure and safe for use[1].
Common Mistakes
- Failing to level or properly center the step assembly, which can cause improper door closure or unsafe use[1][3].
- Using incorrect drill bits or fasteners for the subfloor material, which may weaken the installation[1].
- Overtightening bolts and damaging the doorframe or fasteners[1].
- Forgetting to adjust the latch/lock mechanism before first use[1].
Pro Tips
- Have a helper support the step while securing it, especially during alignment and adjustment[1][3].
- Remove or modify threshold covers to ensure firm contact if present[3].
- Always test the step's locking and release before traveling, simulating road vibration to confirm security[1].
- If unsure of subfloor construction, err on the side of using a steel backing plate for added strength[1].
Time Estimate
- Manual step installation typically takes 30-60 minutes for most models[4].
- Allow extra time if removal of old steps, adjustments, or unfamiliar installations are required.