by - sites and specialty RV suppliers are often the best sources for unique or technical components like trim and brackets.
Product Name: Lonseal MultiSoft Vinyl Wall Paneling Flexible, washable, upholsterygrade vinyl 54" wide, sold by the linear foot Multiple colors and textures Description: Lonseal MultiSoft is a premium, flexible fabriclook vinyl wall and ceiling paneling ideal for campervans. It offers comfort, easy cleaning, and a finished look, while being moisture and moldresistant—perfect for mobile environments. ## Laminate Flooring Product Name: Coretec One Luxury Vinyl Plank Flooring Resilient, 100% waterproof Attached cork underlayment Durable, scratch and dentresistant Description: Coretec One is a toprated luxury vinyl plank flooring for RVs and campervans, offering a realistic wood look, superior durability, and waterproof performance—essential for hightraffic, mobile living spaces. ## Ceiling Trim Product Name: RecPro RV Insert Roof Corner Trim with 3/4" Leg Amazon: Not listed at time of writing 1 1/4" W x 1" H 92" L, powdercoated aluminum Black or Arctic White Description: This aluminum corner trim provides a clean, durable finish for ceiling and wall transitions in RVs and vans. It’s rustresistant and designed for both weatherproofing and aesthetic sealing. ## Brackets Product Name: RV Designer "I" Beam Track Ceiling Mount Bracket 13/16" L x 1/2" W x 1/4" H Fits 5/16" track slot Includes two brackets and two screws Description: These brackets securely mount "I" beam curtain tracks to campervan and RV ceilings, replacing broken or damaged hardware. They’re essential for attaching privacy curtains and partitions. ## Rubber Flooring Product Name: Regupol SportsTile Rubber Floor Tiles Amazon: Not listed at time of writing 1/2" thick, interlocking rubber tiles Shockabsorbent, durable, and waterproof Available in multiple colors Description: Regupol SportsTile is a premium gym and garagegrade rubber flooring ideal for campervans, offering cushioning, insulation, and easy cleaning. Its interlocking design makes for a quick, removable, and robust floor. Note:
Van Compatibility: Universal; ideal for Transit, Sprinter, and ProMaster vans
A fabric ceiling is an increasingly popular choice for campervan and RV conversions, offering a blend of insulation, aesthetics, and lightweight performance that fits the unique demands of mobile living.
A fabric ceiling, when sourced from specialty RV suppliers and installed with preparation and the right materials, delivers an ideal balance of comfort, customizability, and performance for both casual adventurers and full-time nomads[4][5][1].
The fabric ceiling in campervans and RVs offers a soft, insulated finish that dampens sound and can create a cozy living environment. Here is a comparison with 3-4 popular alternatives, analyzing pros, cons, price ranges, and ideal use cases.
Alternatives
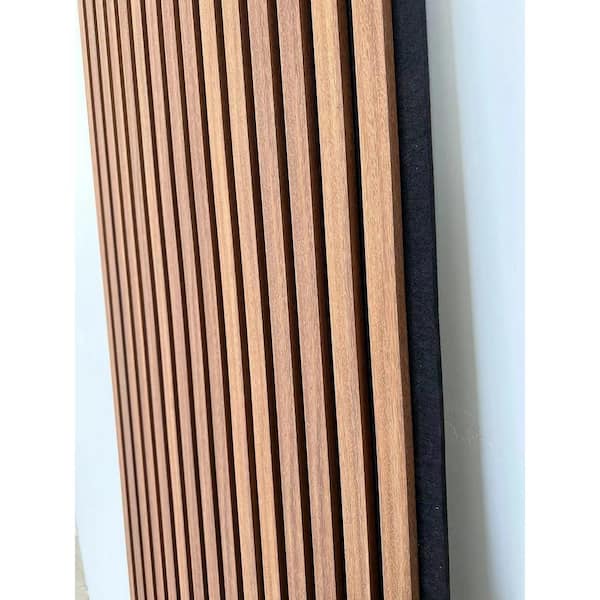
1. Tongue and Groove Planks by Various Manufacturers
- Pros: Very attractive, creates a warm cabin look, durable if properly sealed[2][5]. Good for a premium, permanent feel.
- Cons: More expensive ($150–$500+ in materials for a van), time-consuming installation, heavier than fabric or simple panels[2][5].
- Price: $150–$500+
- Choose if: You want a high-end, polished interior that adds value and aesthetics.
2. Plywood Panels (Plain or Covered) by Various Manufacturers
- Pros: Customizable, affordable ($50–$200 for basic setups), lightweight, and easy to install; can be painted or covered with fabric[2][3][5].
- Cons: Can look basic or unfinished if not covered; some maintenance (painting, sealing)[3].
- Price: $50–$200
- Choose if: You want a budget option with the ability to customize later or keep it simple.
3. Carpeted Ceiling Panels by Various Manufacturers
- Pros: Excellent sound absorption, insulation, and minimal maintenance; durable (can last 30 years)[3][5][6].
- Cons: Susceptible to holding dust or odors; some people dislike look/texture[3][6].
- Price: $80–$250 installed
- Choose if: You prioritize sound dampening and insulation over aesthetics; want low-maintenance.
4. ABS Plastic or FRP (Fiberglass Reinforced Panel) Sheets
- Pros: Extremely tough, waterproof, thermally stable, easy to clean[4].
- Cons: Expensive ($500–$1,100+ for a van), heavy, can be tricky to mount securely overhead[4].
- Price: $500–$1,100+
- Choose if: You need high durability for heavy-duty or industrial applications.
Fabric Ceiling
- Pros: Lightweight; inexpensive ($50–$150 for fabric/materials); easy to install and replace; improves acoustics; flexible in curves and contours[3][5]. Adds a homey, insulated feel; lots of design choices.
- Cons: Can show stains/wear faster than hard surfaces; may need cleaning or occasional replacement; less durable to abrasion or sharp objects[3][5].
- Price: $50–$150 in materials
- Choose if: You want a fast, affordable, soft-touch finish, prefer minimal weight, or want to avoid condensation/dripping in extreme cold/moisture.
Performance in Vanlife Use Cases
- Fabric suits lightweight builds, quick projects, and those needing extra insulation or sound dampening on a budget.
- Hard panels (e.g., plywood or tongue and groove) are best for year-round, high-wear, or premium interiors.
- Carpet excels in cold climates and for quiet rides.
- ABS/FRP is superior for rugged, waterproof requirements.
Each option balances cost, aesthetics, weight, and long-term resilience differently; match the ceiling material to your priorities (comfort, looks, weight, budget, maintenance).
Tools Required
- Sharp utility knife or scissors
- Measuring tape
- Straight edge or yardstick
- Adhesive spray or high-tack contact adhesive (recommended for fabric)
- Staple gun (optional for added hold)
- Cleaning cloths
- Safety gloves and mask (adhesive/fabric handling)
Prerequisites
- Insulate and prepare the roof: Install insulation (such as polyiso foam or spray foam) and vapor barrier, ensuring all electrical wiring (lights, fans) is run where needed[2][8].
- Attach furring strips or mounting boards across roof ribs to create a secure base for the fabric[2].
- Clean and dry all ceiling surfaces to remove dust and grease for proper adhesive bonding.
Step-by-Step Instructions
1. Measure & Cut Fabric
- Measure the total ceiling area and add 2-3 inches to width/length for trimming and wraparound.
- Lay out the fabric on a clean surface and cut.
2. Dry Fit
- Trial-fit the fabric in the van, checking for obstacles like lights, fans, or seams[2][9].
- Mark cutouts or notches for fixtures.
3. Prepare Surfaces
- Wipe down ceiling panels and furring strips with a clean, dry cloth.
- Sand rough edges if using plywood panels as a base[1].
4. Apply Adhesive
- Work in sections (2-3 feet at a time). Spray adhesive both on the ceiling surface and the fabric back according to manufacturer instructions (ventilate well).
5. Mount Fabric
- Carefully press the fabric up to the adhesive-coated surface, starting from one end and smoothing as you go.
- Use a straight edge or hands to firmly smooth out wrinkles and bubbles.
- For added security, staple fabric edges to furring strips or mounting boards.
6. Trim & Finish
- Cut out holes for roof vents, lights, etc., using a utility knife.
- Wrap excess fabric neatly around edges and staple or glue in place for a finished look[1][2].
Common Mistakes
- Skipping insulation: Leads to poor temperature control and condensation issues[2][8].
- Uneven adhesive coverage: Results in sagging or loose fabric. Apply adhesive uniformly.
- Not pre-planning for fixtures: Failing to trim accurately around vents/lights can ruin the finish[2][9].
- Using too thin or stretchy fabric: Can cause sagging over time—use automotive-grade or upholstery fabric for durability.
Pro Tips
- Use lightweight, durable fabric to minimize added weight.
- Work with a helper to ensure tension and alignment when mounting larger fabric sections.
- Allow adhesive to fully cure before reinstalling lights/vents.
- If using panels for the base (like thin plywood), pre-wrap panels with fabric before installing for a cleaner finish[1].
- Plan for removability: secure edges with screws or removable trim if you may need future access above the ceiling[1].
Time Estimate
- A typical fabric ceiling install takes 4 to 8 hours depending on van size, prep complexity, and experience level[1][2].